Monday, 28 October 2013

Australia and the Titanic

Well the title to this post may be somewhat misleading. I don't think there is a connection between Australia and the Titanic except here.........jigsaws.

"The Great Australian Jigsaw" is made up of 500 pieces and is obviously circular. This makes for some very interesting shapes in the pieces. It is 50 cm round when finished and I have now glued it to a board used for cake decorating. You can't see it here but there is actually one piece missing. I plan on getting creative with some textas or pencils to fill it in if I can't find it.

The artwork is by Australian artist Greg Gillespie.

The Great Australian Jigsaw by Greg Gillespie

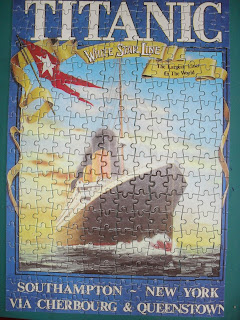
This next jigsaw puzzle is only 250 pieces and the finished size is 41 x 28 cm. I bought this about 10 years ago when a travelling exhibition came to Bendigo. My daughter and I went to see it in the old town hall. It featured some actual memorabilia from the Titanic, stories about some of the people that sailed on it and costumes from the movie.

Titanic - White Star Line - the largest liner in the world.

Talk again soon

Jeanette
Sunday, 27 October 2013

The Bendigo Heritage Mosaic - Rosalind Park

Below the tower, in Rosalind Park, is the Bendigo Heritage Mosaic.

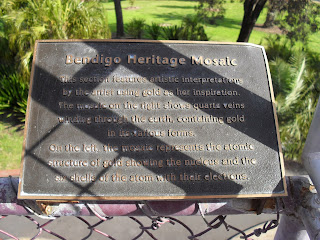
This section features artistic interpretations by the artist using gold as her inspiration

This mosaic represents the atomic structure of gold showing the nucleus and the six shells of the atom with their electrons
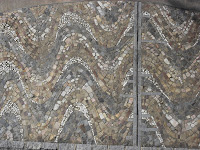
This mosaic shows quartz veins winding through the earth, containing gold in its various forms


Designed by Maery Gabriel, The Bendigo Heritage Mosaic was completed in 1987 by hundreds of volunteers from the Bendigo community. 
The differing background colours indicate the different ages of the rocks.
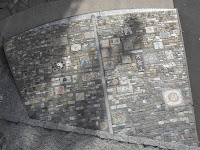
This mosaic is a stylised representation of the central area of the main Bendigo goldfield based on a geological plan. It shows the main lines of the reef including the famous Hustlers, Garden Gully and New Chum.


The mosaic depicts aspects of Bendigo’s mining history. 

Picked out in quartz are the saddle reefs for which Bendigo was so famous.
A typical cross section of the Bendigo goldfield is portrayed here.


It is designed to be viewed from above, on the first level of the lookout tower where there is more information displayed.

The mine layout in this design features part of the Garden Gully line of reef.
The mining of quartz reefs began in early 1853, and continued for 101 years, yielding about 17 million ounzes of gold.


Shown here is the Ironbark Mine on the Sheepshead reef. It has an interesting pattern of drives, stopes and winzes.The smaller mosaics are emblems representing some of the groups and nationalities present on the goldfields on those early days. Also included are designs showing local flora and fauna and items of historical interest to Bendigo.


These photographs really don't do the mosaic justice. When you come to Bendigo it is worth the climb up the tower for the view and to get a good overview of the mosaic.

Talk again soon

Jeanette


Friday, 25 October 2013

The Short and Long of it

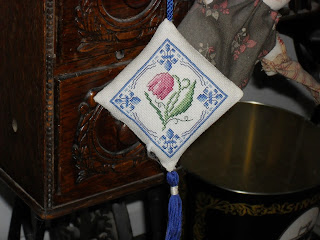
Today I would like to share some more cross stitch projects that I have finished over the years. This first design was from a kit by the Heritage Craft company of England. I made it as a birthday present for my friend Chris. It is supposed to be a scissor fob but she hangs it on her Singer sewing machine stand.

Chris' scissor fob - front

The design was fairly quick to stitch. I actually did it when we were on a camping holiday in Adelaide one year. It was good to work on in the Summer heat because it wasn't too large.

Chris' scissor fob - back

 This is a view of the back. It was also fun to make the tassle and very simple.

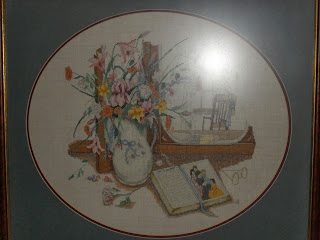
Now I will share a project that I made for my sister's 30th birthday. This is a Paula Vaughan design. I love her designs because they usually feature a quilt or flowers in them somewhere and her colours are exquisite. This design is called "Little Women" and I worked it on linen. I chose this design because one of my sister's favourite books is Little Women by Louisa May Alcott. Also, we both love the movie - the Katharine Hepburn version.

Little Women by Paula Vaughan

This is the cross stitch project that has taken me the longest to complete because it is quite large. I stitched on it every day for four months. In some places she blends 2 colours together, one strand of each, to get the subtlety of shading required. I entered it at the local agricultural show which is on at the end of October each year in Bendigo. It cost 50 cents to enter and I got second prize and won the grand sum of $2.

Talk again soon

Jeanette
Thursday, 24 October 2013

Marta

Today I will share a jewellery kit with you that is called "Marta". It is for a bracelet that should be quite simple to make as there is no clasp.

supplies for "Marta" bracelet

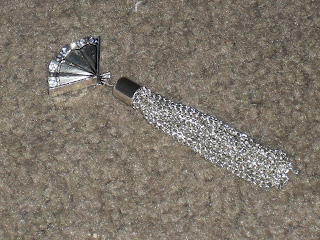
The first step is to cut the chain into 12 pieces of equal length, open an eye pin, thread them on, close the pin, cover with a silver "cap" and make a loop at the top of the pin. Before closing the loop, attach the fan shaped spacer.This was a bit fiddly but not too difficult.

the completed tassel

 Next I laid out the beads and spacers in the order that I would be threading them onto the "elastic".

the order of the beads and spacers

Then I threaded all of the beads and spacers onto the elastic, starting and ending with the fan shaped spacer, and tied the ends of the elastic together, forming the first row.

round one finished

Repeat this with the second row, a little bit more fiddly to tie off this time.

the completed bracelet with dragon spacer and tassel

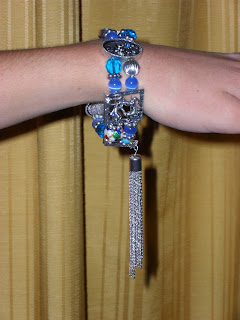
And here we have the completed bracelet, modelled by my daughter. I really love some of the designs on the beads and spacers in this kit, especially the dragon on the one above. I was born in the year of the dragon and should probably keep this for myself but my daughter has already called dibs on it. Oh well.

another view of the completed bracelet

Talk again soon

Jeanette


Wednesday, 23 October 2013

Nice People, Nice Things (NPNT) # 8

Welcome to the next instalment of Nice People, Nice Things (NPNT) designed by Helen Stubbings of Hugs n Kisses.
Silently, one by one, in the infinite meadows of heaven,
Blossomed the lovely stars, the forget-me-nots of the angels.
- Henry Wadsworth Longfellow, Evangeline: A Tale of Acadie

NPNT Stars

I love the view of the Milky Way from here in Australia. I don't know what it is like in other parts of the world but if you can get away from the city lights it is spectacular.

View of Milky Way in Australia

Much of my reading time over the last decade and a half has been spent reading aloud to my children. Those children's bedtime rituals of supper, bath, stories, and sleep have been a staple of my life and some of the best, most special times I can remember.

            - Louise Brown 

NPNT Bedtime

This quote from Louise Brown is very true. Since having children I have really enjoyed the bedtime ritual of reading a story. They have now gotten too old for me to read to them but this is still one of my favourite times of the day. I also love my bed in the winter time, with its woollen underlay, flannelette sheets and feather doona. When I get my Nice People, Nice Things quilt done I am really looking forward to spending my first night with it on my bed.

Talk again soon

Jeanette
Tuesday, 22 October 2013

Card making techniques

Today I thought I would share some different card making techniques that I have tried.

This is a card that I made a few years ago for my nieces's birthday. It uses a technique that can be found here called Iris Folding. Instead of using paper though, I decided to use ribbon for the dolphin. The rest of the embellishments are stickers.


This next card uses the technique of quilling - twisting and shaping thin strips of paper. I got the instructions for this card from a book at the library. Sorry I don't remember the title but I am sure you can find something at your local library or online. The technique is simple and fun.


The final technique I will share with you is pinpricking. This is one that I picked up as a kit. The design for the leaves is printed on the back of the card and you use a pin pricking tool to punch holes through the card. This leaves a lovely, raised design on the front. Cut a fancy edge, glue it to a card and you are done. This is one that you could use any embroidery design for.


Hopefully there is something here that you would like to have a go at. Believe me they are all easy and fun to do.

Talk again soon

Jeanette


Monday, 21 October 2013

Mixed Medium

When I found out that both my brothers, and their partners, were expecting babies this year, and they would both be girls, I decided to make something for them. I looked through my craft books and on the web and came up with an project by amalgamating all of these ideas.

Petit Noes by Rosalie Quinlan
ISBN 978-1-908170-32-3

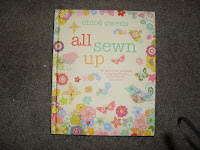
I liked Rosalie Quinlan's and Chloe Owens idea of birds on a beaded string. I also like Chloe's idea of a mobile with flowers and butterflies.

supplies for mobile
 shapes cut and sewn for mobile

I gathered some supplies together, covering a wooden hoop with bias and cutting out some shapes.

shapes embellished for mobile
stuffed shapes for mobile


I sewed them and stuffed them. I embellished them with ric rac, buttons and embroidery.

finished mobile

Then I attached them to the hoop with beaded strands and criss crossed the wire across the hoop to attach the final beaded strand. I think it worked out quite well.

Talk again soon

Jeanette


Sunday, 20 October 2013

Police Barracks, Rosalind Park, Bendigo

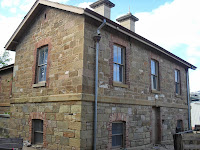
Bendigo Senior Secondary College is located abutting Rosalind Park and I went there for two years. I can honestly say that I never noticed this building sandwiched between my school and the Camp Hill Primary School next door. Now that I have found it I would like to share it with you.


Police Barracks Lane

Barracks Lane is right in the heart of the old Camp Reserve and was the earliest administrative centre of the Bendigo goldfield. 

Police Barracks # 2Police Barracks # 1


A short distance up this lane are the old police barracks, built in 1859 using local sandstone. 

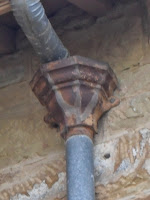
Police Barracks down pipe detail
Police Barracks # 3


Back then the barracks would have been conveniently close to the old Supreme Court building which can be seen from the western side of the fernery. 

Police Barracks # 4
Police Barracks # 5


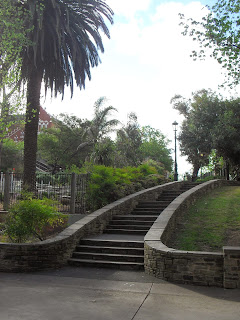
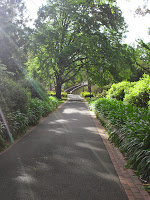
Looking back into the park there is a good view of the avenues of trees that were planted in the latter half of the 19th century. 

Police Barracks lane, Rosalind Park
through the park to Police Barracks Lane


While the numerous elms (Ulmus x hollandica) and oaks (Quercus canariensis x Q robur) are the most numerous tree species, the Park does have other interesting tree species to look out for: African Yellowwood (Afrocarpus falcata), an avenue of ten mature Canary Island Pines (Pinus fanariensis), Australian Teak (Flindersia australis), Bunya-Bunya Pine (Araucaria bidwillii) and Queensland Kauri (Agathis robusta).


Rosalind Park pathways


I hope you have enjoyed this look at this wonderful building from our Gold Rush era and some pictures from Rosalind Park.

Talk again soon

Jeanette
Saturday, 19 October 2013

Garden Chic # 4

Today's block for the Garden Chic quilt is called Father's Choice. Here you can see that all of the pieces are pre-cut which does save some time. Unfortunately, the fabric isn't the best quality and the cutting isn't always square so I do have to spend some time trimming before I start.

makings for block # 4 of Garden Chic

Here I have laid out the pieces to give me a better idea of the layout and also to check that they are all there. Wouldn't it be awful if something was missing?

Garden Chic # 4 laid out

The completed block below. As you can see the lemon fabric is quite thin, the seams are visible and even my grey carpet is showing through. Hopefully this won't be a problem when it comes time to put it all together.

Garden Chic # 4 - Father's Choice, completed

And here are the four blocks I have completed so far. I think they look rather nice altogether and it is certainly giving me a better idea of exactly how big this quilt will be. To give you a better idea the Father's Choice block is 15 1/2 inches square.

Garden Chic, blocks 1 - 4

Talk again soon

Jeanette

Friday, 18 October 2013

My first finished quilt

Hello again. Today I thought that I would share my first quilt with you. It is nothing fancy, just a panel that I sandwiched with batting and backing fabric, so it is technically a quilt even though there was no patchwork involved.
Sunbonnet Sue doll quilt

I made this many years ago for my niece for her birthday. I whipped it up the day before because it is only small and, as I said, it is a pre-printed panel. To ad a bit of interest I used blanket stitch on my sewing machine to go around each of the Sunbonnet Sues. It came back to me when my daughter was old enough. She used it in her dolls pram.

The next quilt I will share with you is the first large quilt that I finished. I measures about 180 cm square and is made with flannel fabrics. I bought it as a kit from Alison at Canterbury Quilts but I modified it slightly. My friend Chris has a lovely raggy quilt on the back of her couch and I have always wanted to make one.

40th birthday quilt front

So after buying the kit I cut the blocks slightly bigger and sat down with a piece of graph paper to work it all out. As this is a quilt as you go type of quilt, I went back to by some flannel for the back. Alison's original quilt is a 10 x 10 with the centre panel and two borders. Mine is a 9 x 9 with only one border.

40th birthday quilt back

When I was finished cutting I had some scraps left over that I knew I would never use on anything else. So I sewed them all together and put a border around it to make it the same size as the centre panel on the front. The working out probably took as long as the actual construction but I think it was worth it. It is a great quilt for a male because the centre panel is a farming scene with windmills and tractors. My brother loved it.

Talk again soon

Jeanette